

Good morning!
Can you believe this is finally up and live? I know it’s taken me so long but I wanted the post to be as helpful as possible and the kitchen to be completely finished before shooting. I will try to cover everything below and if I missed anything in particular just leave your question in the comments and I will get back to you! I also have a ‘Kitchen’ highlight on Instagram that shows video and detail of the process in real time.
First, let’s take a look at a few BEFORE photos to get an idea of where we started:
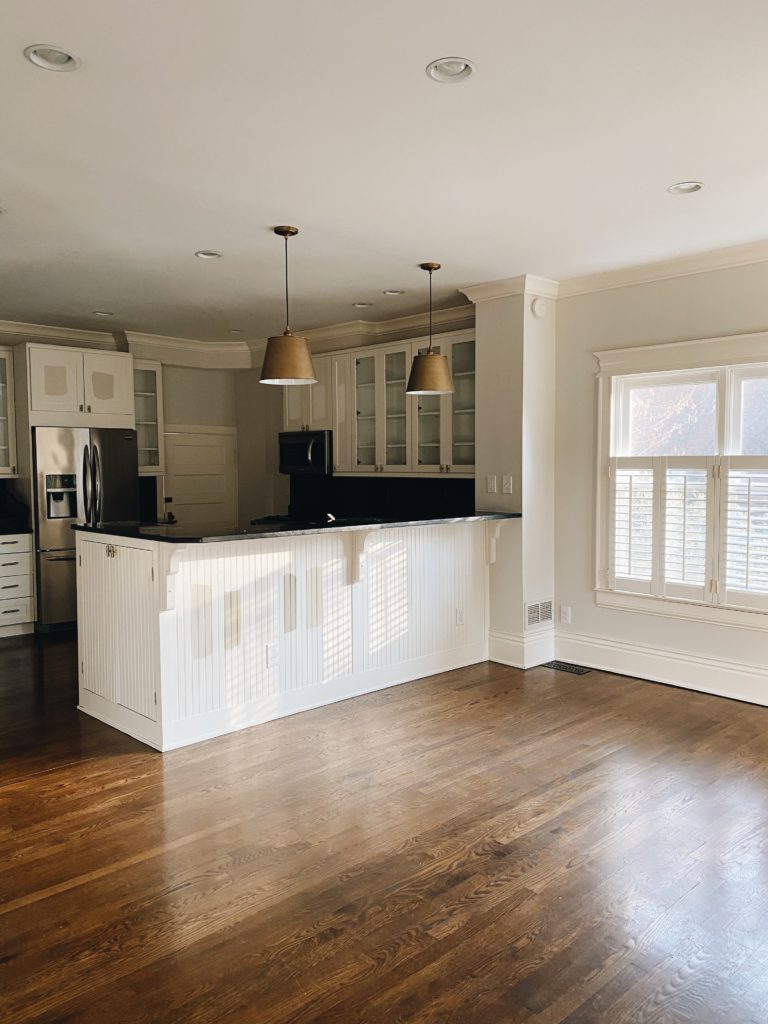
I wanted to open this area up to make it all more useable and try to bring more light into the back corner!
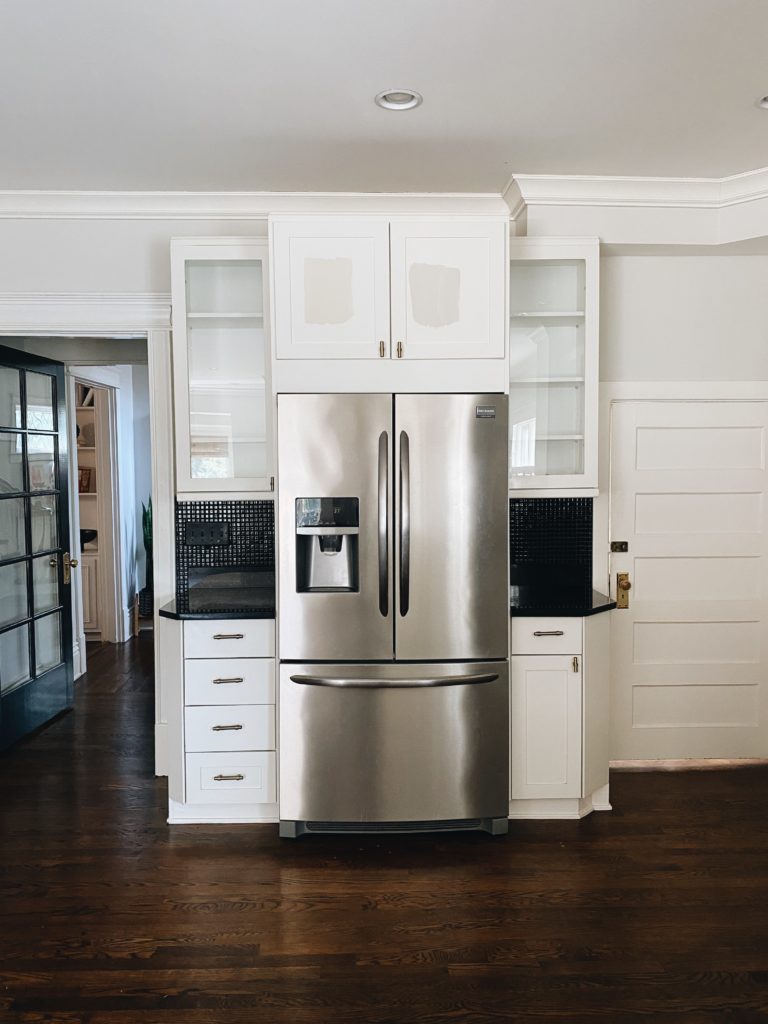
My main focus here was to expand the cabinetry and make everything flush. These tiny countertop spaces were not used at all and I thought a single piece of cabinetry would look cleaner!
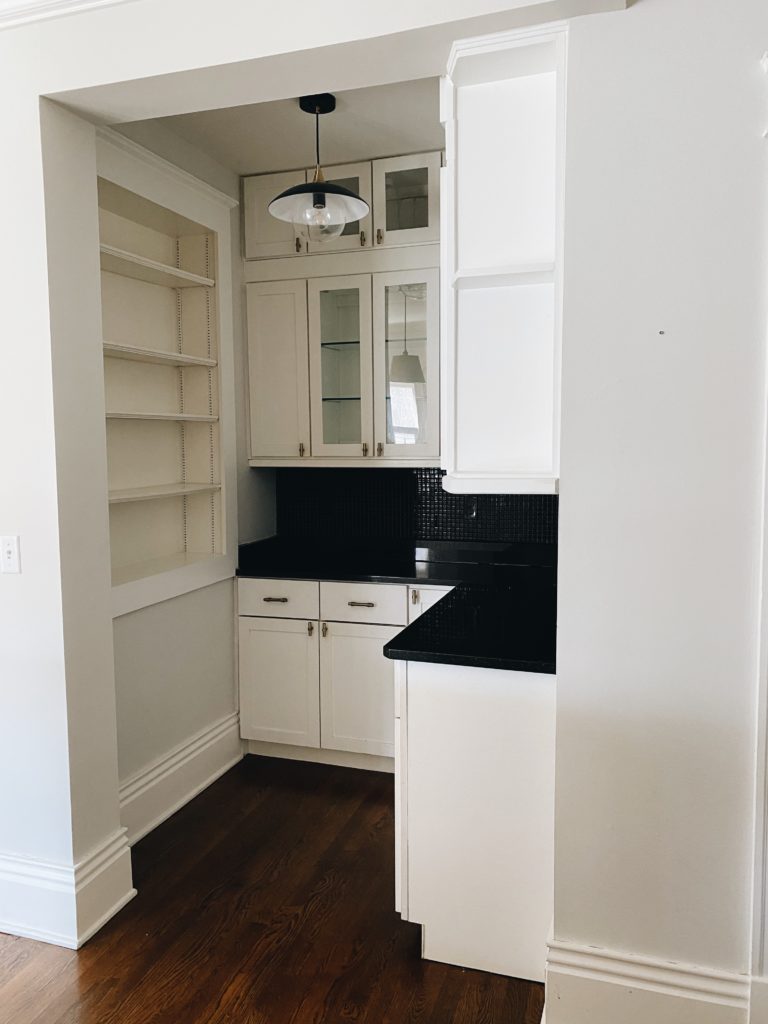
I really wanted to open this all up! There were several awkward shaped cabinets we couldn’t use for much and I hated feeling like these shelves were cluttered and open.
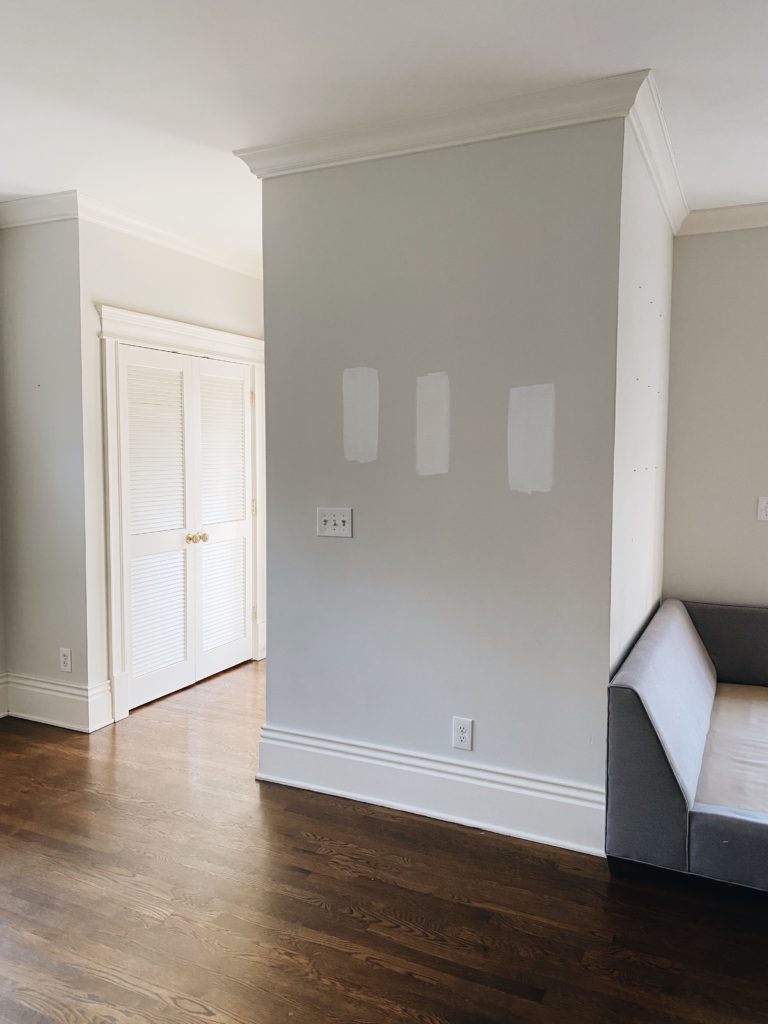
Behind this wall was our washer/dryer and the door to our backyard. I really wanted to relocate this to allow more open space for our eating area and because I didn’t love this location for laundry.
What did you want to change?
When we initially started house hunting, we decided early on we didn’t want a home with an ‘updated’ or ‘renovated’ kitchen per se. I was fairly confident nothing that was renovated in the recent past would be exactly what we wanted so it was smarter to find something that worked for the time being that we could update to our liking down the line.
Now, don’t get me wrong our previous kitchen was lovely but I didn’t feel like it utilized the space as well as it could have and there were things I would have loved to change stylistically. This was definitely not a spur of the moment decision and we had been saving for this remodel essentially since we moved in two years ago.
To prepare, we set a rough budget of what we thought we may need and I started saving inspiration and ideas to a folder on my computer. Pinterest is a fav of mine for interiors and you can always create a board there to help you narrow in on your style.
A few things we wanted to accomplish: open the floor plan so it felt more cohesive with the den, get rid of the soffits everywhere, lighten the space, and create a huge island! Also, if you haven’t read this post I share 4 things I am really happy I included in our kitchen reno here which will be helpful as well.
So, let’s get into some FAQ and then we will look at the after:
Did you hire a designer?
I did not BUT I highly recommend it if you are on the fence! There is a reason that designers are so amazing and knowledgeable aside from having wonderful taste. My dear friend Kira is a very talented designer and helped me throughout the process when I panicked and needed to bounce an idea off of her. I had a very clear vision of what I wanted and there was still millions of tedious detailed decisions to make. If I had not hired a contractor, it would have been impossible to manage the project on my own. My advice it to interview as many as you can and find someone who is in line with your style!
Why hire a contractor?
To be honest, I never considered not doing it. Managing subcontractors is not something I was interested in and it’s a tough job which I don’t envy. I also didn’t want to find subs on my own and really liked having a contractor that spearheaded the project with me and knew who to call for what and could guarantee that their quality was top notch. As far as how we decided who to hire, we spoke to a few people and really clicked with our contractor immediately. He was knowledgeable, only worked in old homes, and when he sent us the estimate he had broken down rough costs by category which I loved. Everyone else had just sent these bulk numbers which seemed hard to decipher and we met with a few people who flipped homes and that was also a red flag for me.
If you are local and looking for someone, please feel free to email me and I can get you his information!
What was your budget?
I won’t share exactly how much we spent for personal reasons but if you google estimated luxury kitchen renovation costs, I think they are fairly accurate. You have to remember that the fee you are being presented with from your contractor is just the construction and fabrication. You also need to factor in appliances, lighting, hardware, tile and anything else you may be needing. We also received very similar quotes from multiple contractors but I preferred how ours listed average breakdowns instead of just presenting us with one arbitrary number.
What materials did you use?
- A quick note, our contractor works exclusively with these subs and I am sadly not at liberty to share their information! You are welcome to get in touch with our contractor (just send me an email!) about your project. To be honest, I had very little interaction with these subs because he handled everything!
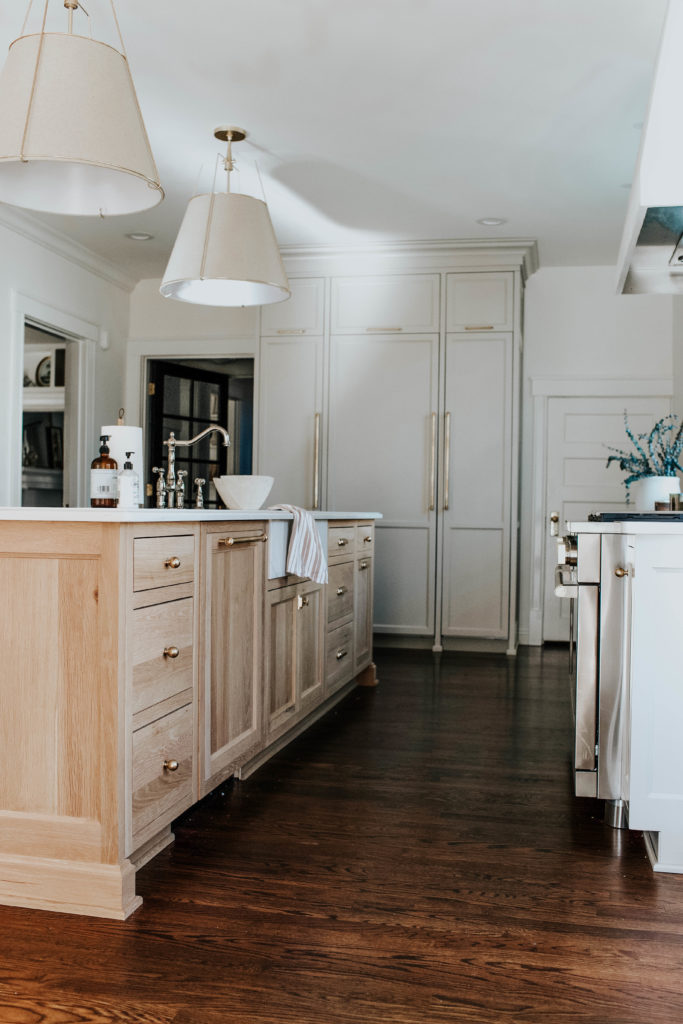
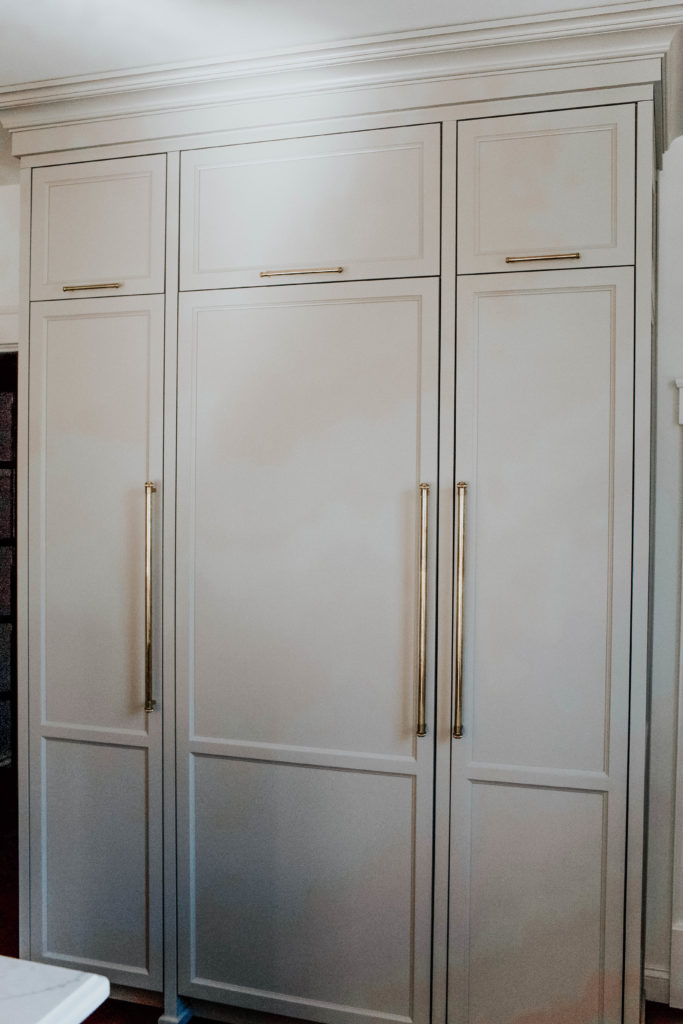
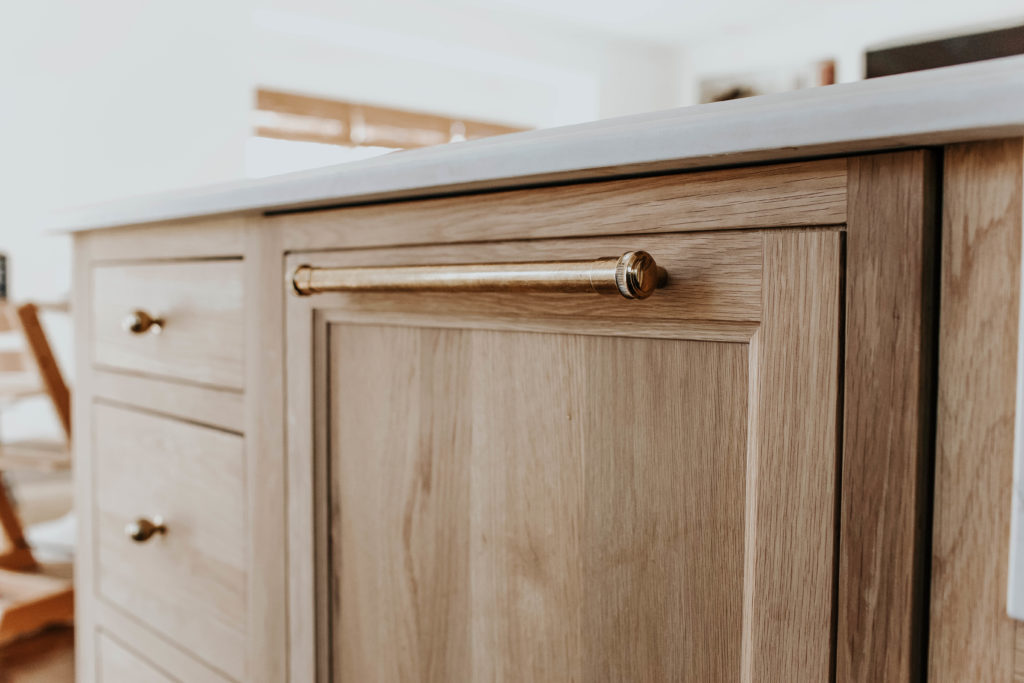
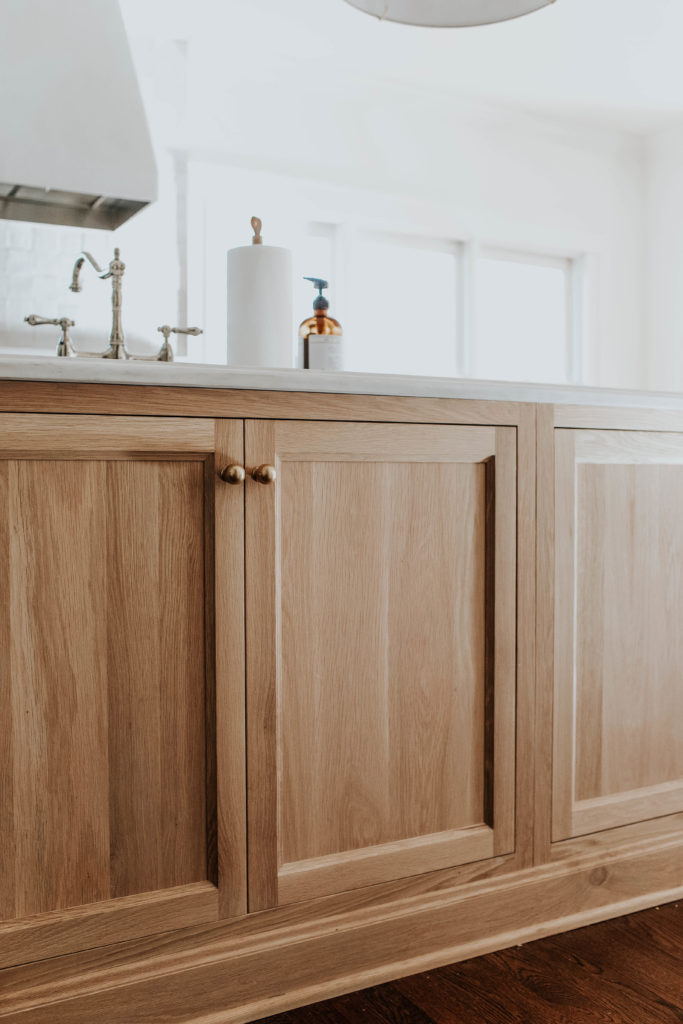
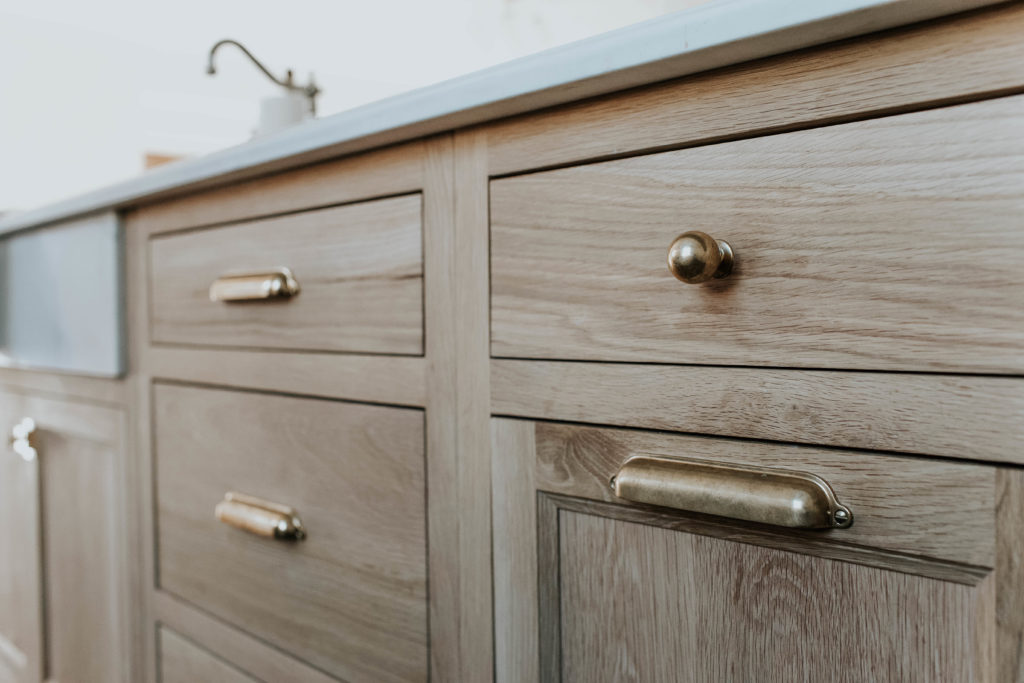
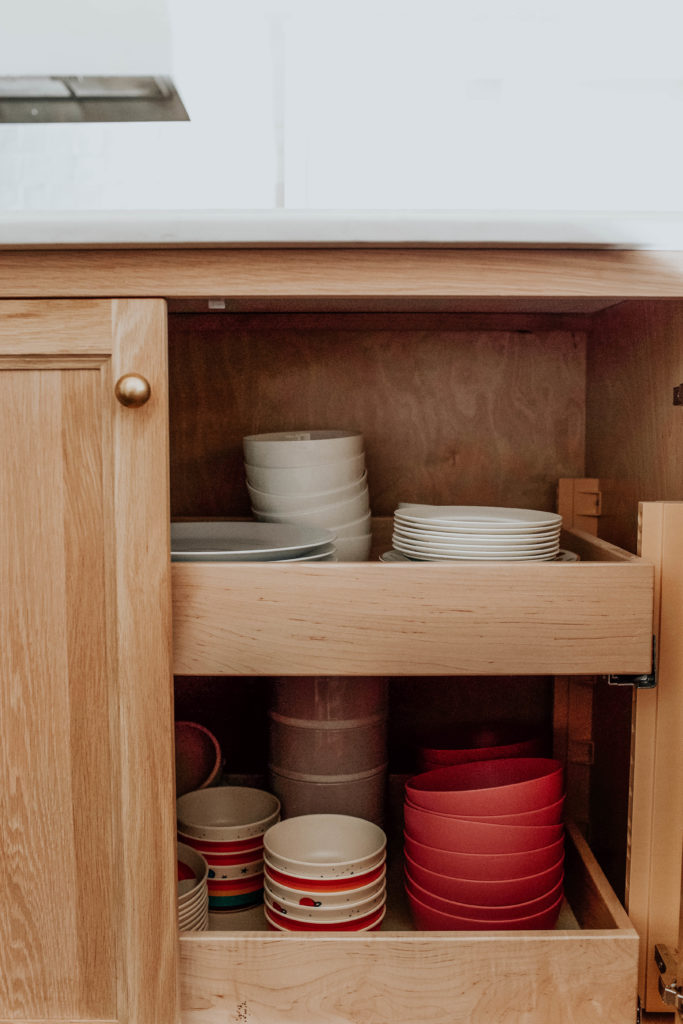
Cabinetry: Custom Amish Cabinetry, Unfinished White Oak. Our cabinetry is either flat front or a 2 1/4 Rail w/ AD inside & DII outside.
Cabinet color: BM Natural Cream (satin)
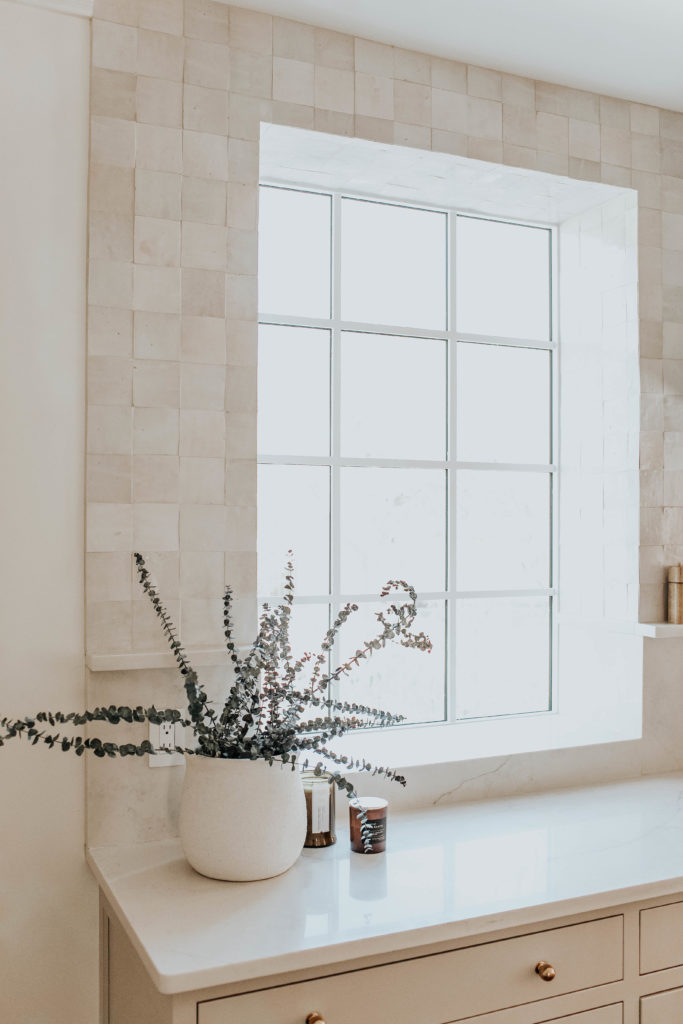
Wall Color: BM Mountain Peak White (washable flat finish)
Trim Color: BM Mountain Peak White (Semi-gloss)
Island: White Oak, sealed on site by our contractor to achieve the color I wanted. The sample they had shown me originally looked too orange once sealed! My contractor knew I wouldn’t like it and had found a different option he said he could apply before I even asked. Another reason he was a good fit for us 😉
Sink: Kohler – I found our sink for a steal on Amazon and it looks like they still have it. We have no complaints thus far and love how large and spacious it is. It’s also designed to drain to the center and the dishwasher safe sink protector is the best!
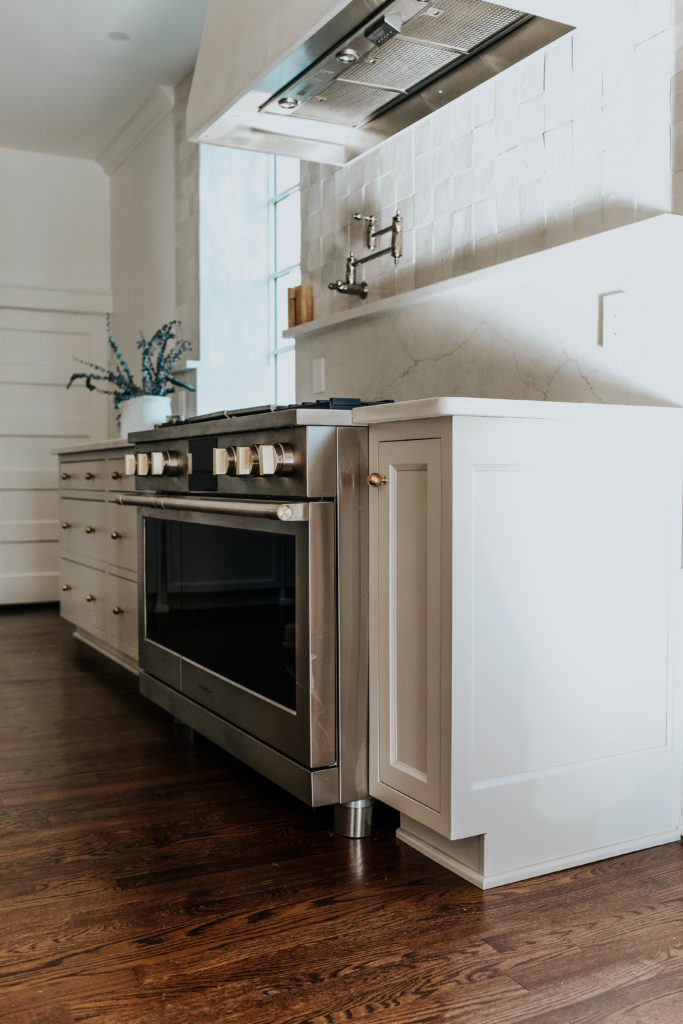
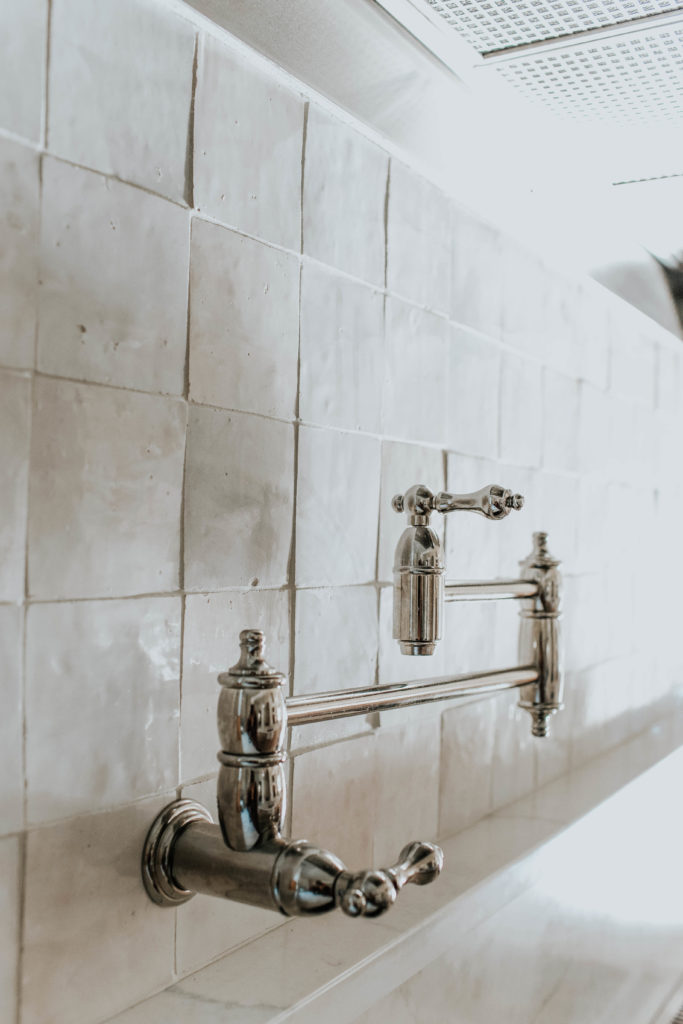
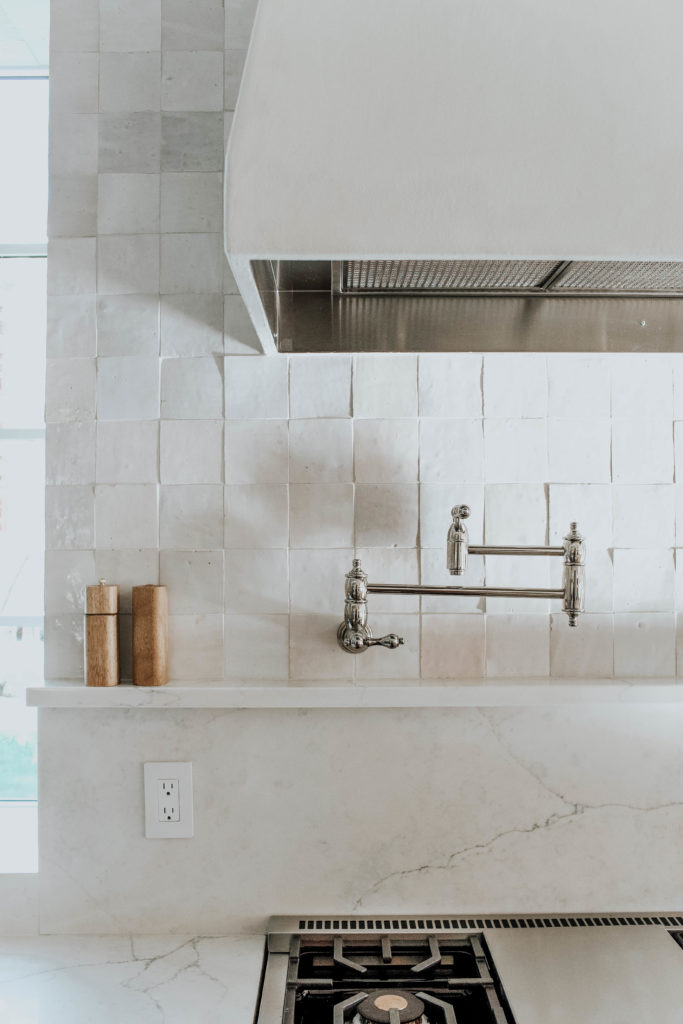
Pot Filler: Signature Hardware – Both our pot filler and faucet are Polished Nickel.
Bridge Faucet: Signature Hardware
Hardware: Rejuvenation – all of our hardware is Unlacquered Brass but just be aware that this will patina over time which is exactly what I was going for. You can see in some of the photos already how it ages, I love the worn in classic look.
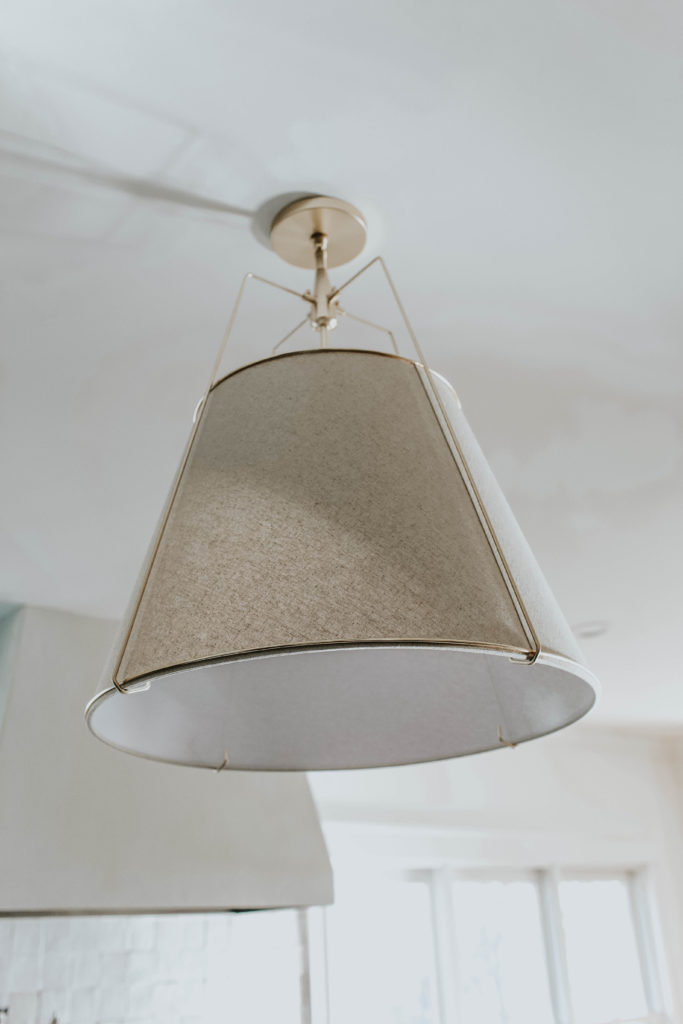
Pendant Lighting: Rejuvenation – Aged Brass with Sand Shade. I ordered the shortest custom length and then we omitted the bar it came with to achieve the optimal height for our space. Our ceilings are about 10ft high in here.
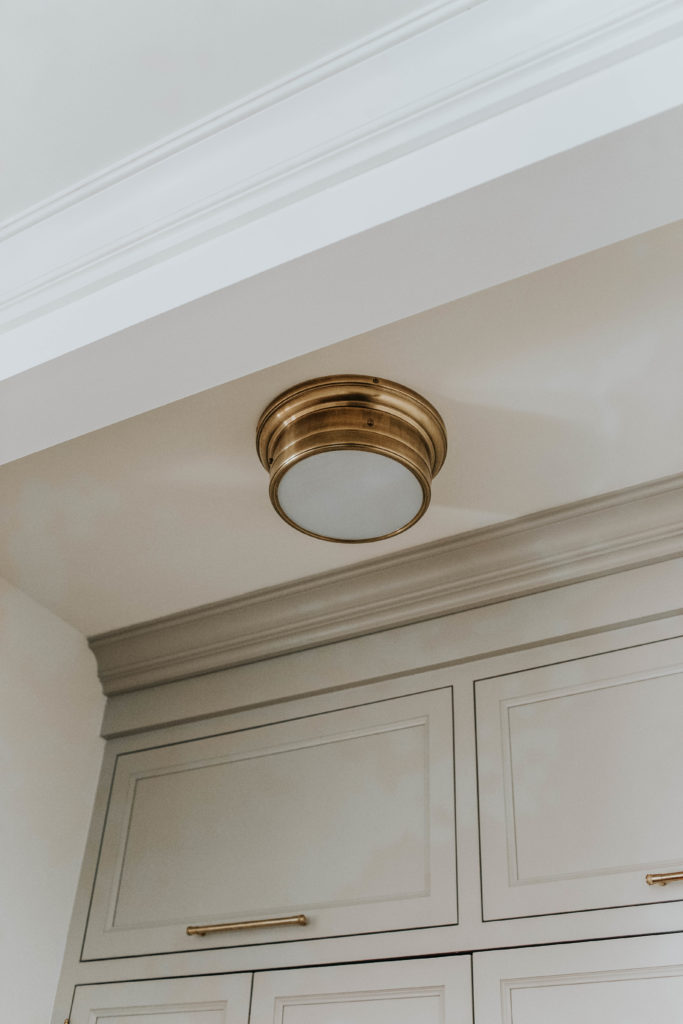
Pantry Lighting: Visual Comfort – Size small.
Hallway Lighting: Rejuvenation – I love this pendant so much and was desperate to find a way to incorporate it. We have it hanging in the hallway entrance to the kitchen!
Tile: Clé Tile – Weather White Zellige. I looked at several brands that made a similar tile for less and for me, nothing else compared. I knew the tile would play such an important role in the kitchen design so I budgeted to make sure we could use this exact one.
Countertops: 3CM MSI Calacatta Monaco Quartz – I looked at a million countertops and visited every slab spot in the city. We were between Quartzite and Quartz and I really struggled with the idea of a man made stone. I love the look of real stone and I am not heavily concerned with wear showing but at the same time we have very little kids and I didn’t want to constantly be worrying about them so we went Quartz. This was by far the most realistic I could find and we are really happy with it! We did an Ogee edge around the island and straight flat around the perimeter.
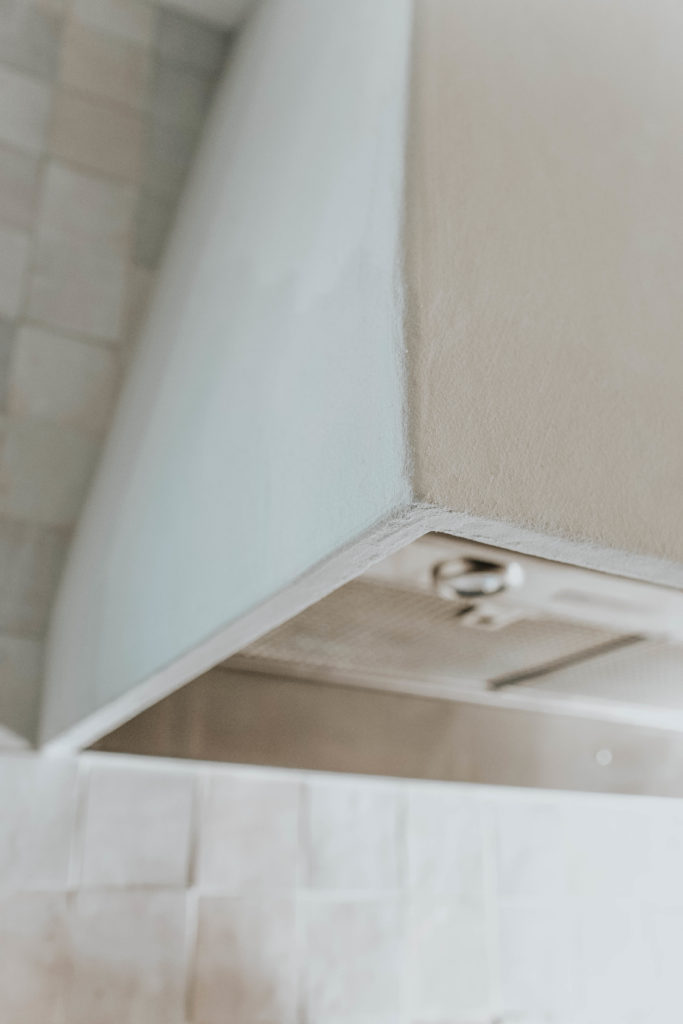
Hood: Custom, made by our contractor and finished in a stucco style and sealed.
Appliances: Monogram Appliances – Included the exact list of what we ordered below!
- Monogram 48” Dual Fuel Professional Range with Four Burners, Grill and Griddle
- Monogram 48” Custom Hood Insert
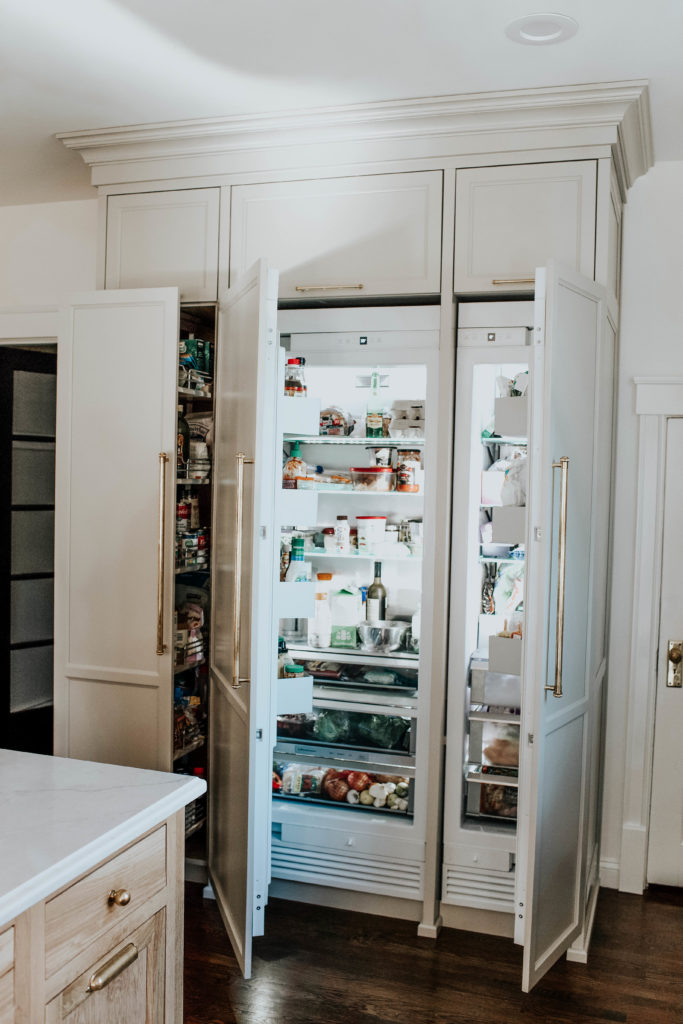
- Monogram 30” Integrated Column Refrigerator
- Monogram 18” Smart Integrated Column Freezer
- Monogram Side-by-Side Heater/Dual Installation Kit
- Monogram 48” Stainless Toe Kick
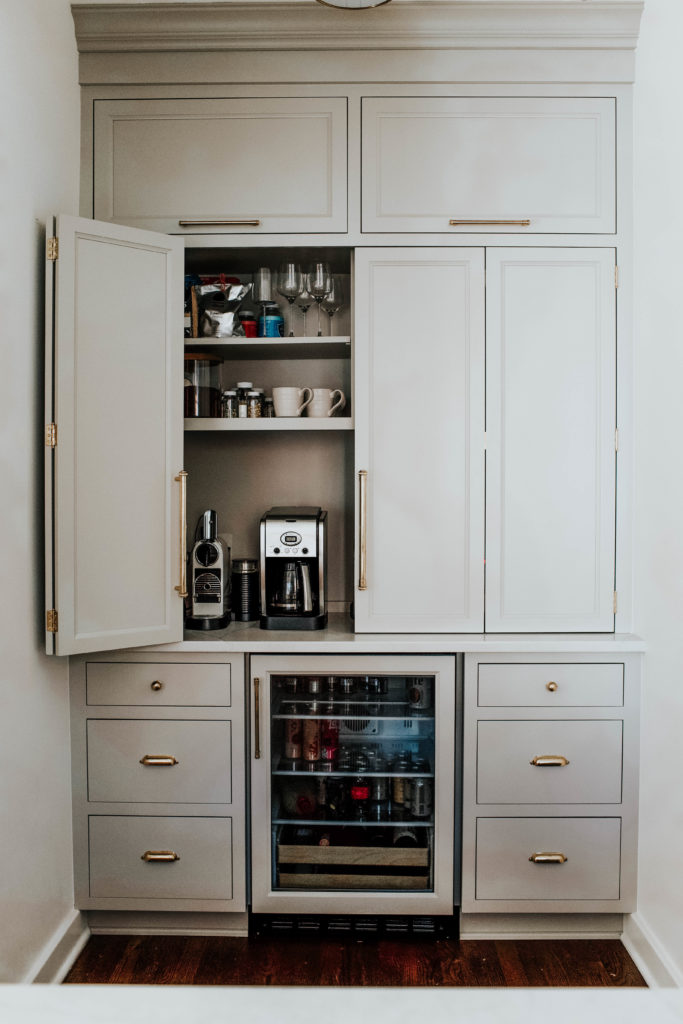
- Monogram Beverage Center
- Monogram 2.2 Cu. Ft. Countertop Microwave Oven
- Monogram Smart Fully Integrated Dishwasher
Okay, now let’s see the after:


I hope that covers most of the questions and info! If I missed anything, just leave it in the comments!


Truly stunning!
Thank you!
love your kitchen so much! I am thinking about using the same zellige tile in my kitchen reno. Is yours 2×2 or 4×4?
Thank you! It’s 4×4
Beautiful kitchen! Quick question- what is your wall paint color? TIA!
Thank you! BM Mountain Peak White – just updated the post with the detail as well!
Absolutely gorgeous! Now that it’s been a while how do you like having the column fridge/freezer vs the bottom freezer? Is the freezer big enough for meal prep, etc? I
Thank you! I love it so much – I find it provides about the same amount of space honestly and it’s easier to organize for me.